Nothing kills a good user experience faster than landing on a boring, confusing 404 page. You know the one – plain text, no navigation, no personality, and zero guidance on what to do next. If someone clicks a broken link on your site, that page is your second chance to keep them around. So instead of letting visitors bounce, why not turn your 404 page into something helpful, branded, and maybe even a little fun?
In this guide, I’ll show you exactly how to create a custom 404 page in WordPress step-by-step using Elementor. And no, you don’t need to touch a single line of code. Whether you’re building a business website, a blog, or an online store, you can design a 404 page that matches your brand and keeps visitors engaged.
Before we go any further, let me clarify something important. The WordPress I’m talking about here is WordPress from WordPress.org – the self-hosted version – not WordPress.com. If you’re not entirely sure about the difference, I’ve explained it in detail in my article “What is WordPress?“. In short, WordPress.org gives you full control over themes, plugins, and customization, which is exactly what we need for creating a fully custom 404 page.
With WordPress.org, you’re free to install powerful page builders like Elementor and unlock advanced design flexibility. This is where things get interesting. Instead of being stuck with your theme’s default 404 template, you can visually design your own layout, add calls-to-action, include search bars, display popular posts, or even guide users back to your homepage.
A well-designed 404 page isn’t just about aesthetics. It’s about reducing bounce rate, improving user experience, and maintaining your brand consistency across every corner of your website. When done right, your 404 page can redirect lost visitors to helpful content, promote your services, or even collect leads.
Now, while Elementor’s free version is great for building regular pages, creating a fully custom 404 template requires a more advanced feature set. This is where Elementor Pro comes into play. With its powerful Theme Builder, you can design not just pages, but also headers, footers, archive templates, single posts, and yes – your 404 page – all without touching PHP files.
So if you’re ready to replace that boring default error page with something strategic and visually appealing, let’s dive in. In the next section, we’ll talk about why Elementor Pro is the key to unlocking full control over your WordPress 404 page.
Why Elementor Pro
If you’re serious about customizing your WordPress website beyond basic pages, Elementor Pro is where the real power starts. While the free version of Elementor is excellent for building standalone pages, it doesn’t give you control over core theme templates like your 404 page. That’s because 404 pages are part of your theme structure, not regular content pages — and this is exactly where Elementor Pro shines.
With Elementor Pro, you get access to the Theme Builder feature. This allows you to visually design essential parts of your website that were traditionally locked behind PHP files. Instead of editing theme code or creating child themes, you can simply drag and drop elements to build custom templates for headers, footers, single posts, archives, and of course, your 404 page. Everything happens inside a visual editor, which makes the process significantly easier and faster.
Another reason Elementor Pro stands out is its dynamic capabilities. You’re not just designing a static error page. You can add dynamic widgets like a search form, recent posts, popular articles, call-to-action sections, or even promotional banners. That means your 404 page can actively guide visitors back into your content funnel instead of becoming a dead end.
Elementor Pro also gives you advanced design flexibility. From motion effects and custom positioning to global widgets and responsive controls, you can make sure your 404 page looks consistent with your overall branding on desktop, tablet, and mobile devices. This level of customization helps maintain a professional appearance across your entire site.
On top of that, the Pro version integrates smoothly with marketing tools and form builders. If you want to turn lost visitors into subscribers, you can embed forms directly into your 404 page. Instead of apologizing for a missing page, you can offer something valuable — like a free guide, newsletter signup, or product recommendation.
How to Create a Custom 404 Page in WordPress
Before we jump into the actual steps, make sure you already have Elementor Pro installed and activated on your WordPress.org website. Since we’ll be using the Theme Builder feature to create a custom 404 template, the free version of Elementor won’t be enough. If you haven’t upgraded yet, this is the time to get the Elementor Pro (Essential / One) plan so you can unlock full template customization.
Once you purchase Elementor Pro, you’ll be able to download the Pro plugin file from your Elementor account dashboard. After that, log in to your WordPress admin area, go to Plugins → Add New → Upload Plugin, upload the Elementor Pro .zip file, then click Install Now and Activate. Make sure the free version of Elementor is already installed, since Elementor Pro works as an extension of it.
After activation, connect your website to your Elementor account by entering your license key. This ensures you receive updates and unlock all Pro features, including Theme Builder. Once everything is set up properly, you’re ready to create your custom 404 page from scratch using a fully visual drag-and-drop interface. Now, let’s move on to the first step.
Step 1: Open Theme Builder and Create a New 404 Template
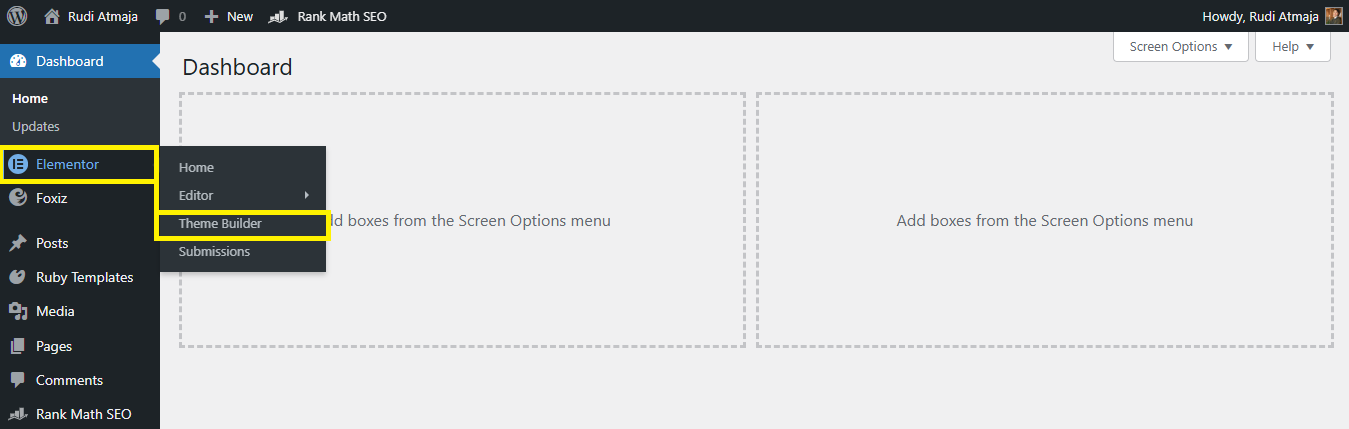
Now that Elementor Pro is installed and activated, the first thing you need to do is access the Theme Builder. From your WordPress dashboard, go to Elementor → Theme Builder. This is where the real magic happens. Instead of editing theme files manually, you’ll be working inside a visual interface powered by Elementor.
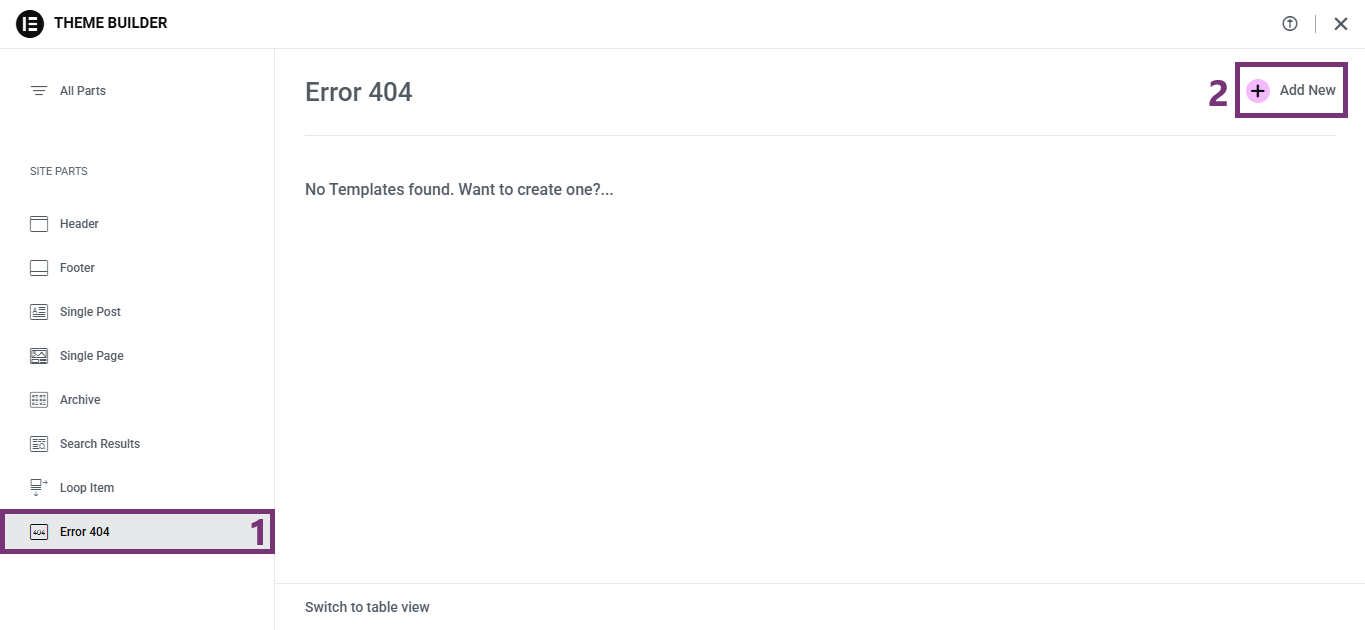
Inside the Theme Builder dashboard, you’ll see different template types such as Header, Footer, Single Post, Archive, and 404 Page. Click on the 404 Page tab, then select “Add New.”

Elementor will ask you to choose the template type — make sure 404 Page is selected — and then click “Insert.”
At this point, you can either start from scratch or choose from one of Elementor’s pre-designed 404 templates. If you want to save time, using a ready-made template is a great starting point. But if you prefer full creative control, you can close the template library and begin designing your custom 404 page exactly the way you want.
Step 2: Design Your Custom 404 Page Layout
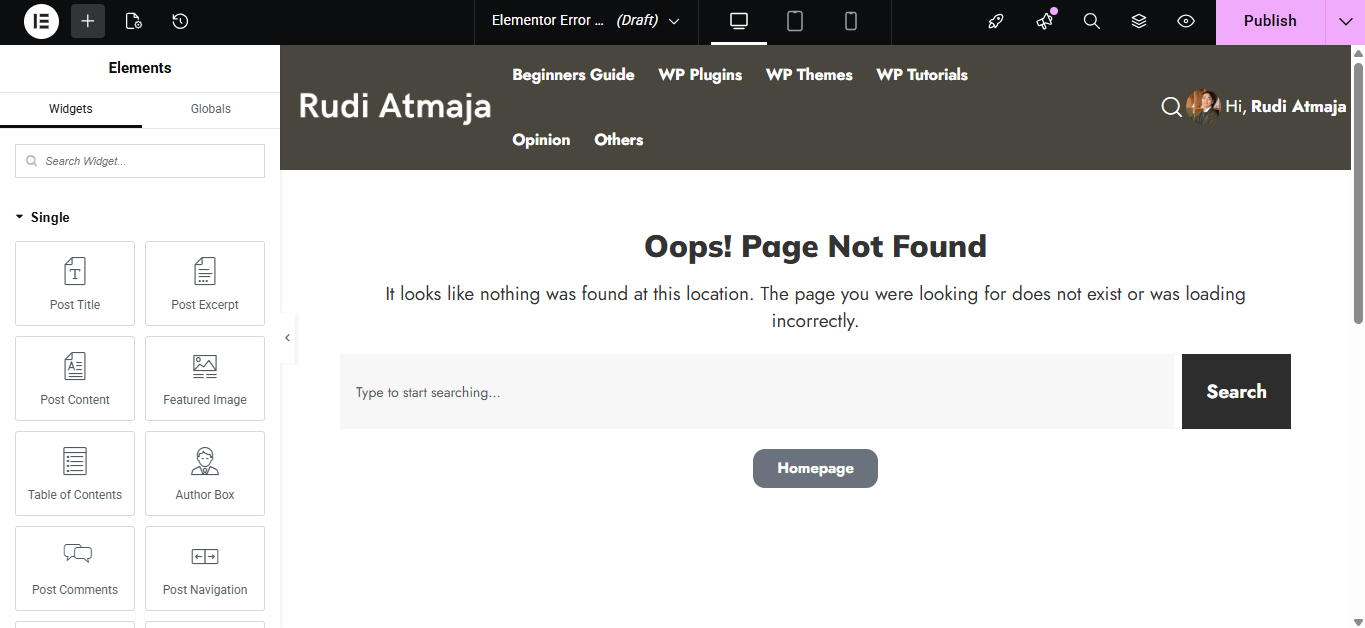
Once the template editor opens, you can start designing your custom 404 page using the drag-and-drop interface. This is where you turn a basic error page into something engaging and useful. Begin by adding a clear headline like “Oops! Page Not Found” so visitors immediately understand what happened. Then, add a short description to guide them on what to do next.
Next, insert helpful elements such as a Search widget, a Button that links back to your homepage, or even a section that displays your latest or most popular posts. With Elementor Pro, you can easily drag in widgets like Search Form, Posts, Buttons, Icons, and more. The goal here is simple: don’t let your 404 page become a dead end. Give visitors a clear path to continue exploring your website.
You can also style the page to match your branding by adjusting typography, colors, spacing, background images, and layout structure. Make sure the design looks good on desktop, tablet, and mobile by switching between responsive modes at the bottom of the editor. A well-designed 404 page should feel like a seamless part of your website – not an afterthought.
Step 3: Set Display Conditions and Publish Your 404 Page
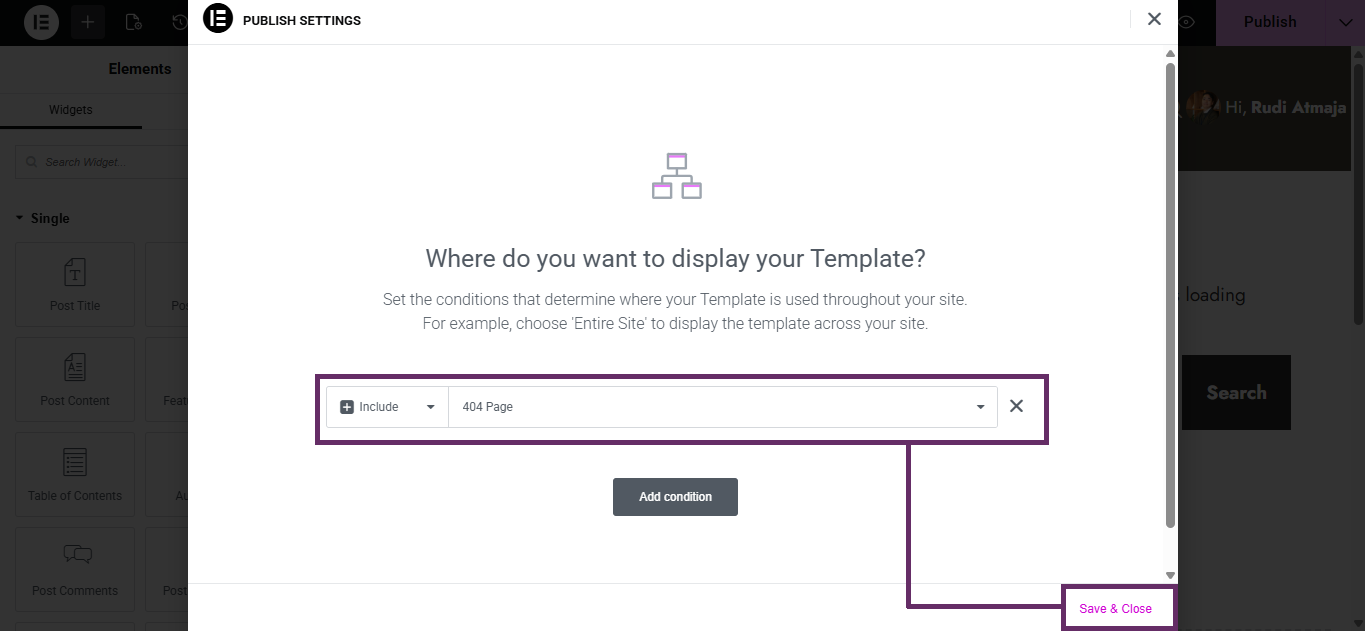
After finishing the design, the next step is to tell WordPress when this template should be used. Click the “Publish” button in the bottom panel, and Elementor will immediately ask you to set the Display Conditions. This is an important step because it determines where your template will appear on your site.
Click “Add Condition,” then choose “Include” → “404 Page.” This ensures that your newly created template will automatically replace the default 404 page from your theme. Thanks to Elementor Pro’s Theme Builder, you don’t need to edit any theme files or touch PHP code – everything is handled visually.
Once you confirm the condition, click “Save & Close.” That’s it. Your custom 404 page is now live. To test it, simply type a random URL after your domain name (for example, yourwebsite.com/random-page) and you should see your brand-new 404 design in action.
Final Thoughts
Creating a custom 404 page in WordPress isn’t just about making things look nicer — it’s about improving user experience and keeping visitors engaged even when something goes wrong. Instead of letting users hit a dead end, you can guide them back to your homepage, highlight important content, or even encourage them to take action.
With the help of Elementor Pro and its powerful Theme Builder feature, the entire process becomes simple and code-free. You don’t need to edit theme files or hire a developer. Everything can be done visually, giving you full control over how your 404 page — and the rest of your website — looks and functions.
At the end of the day, your website should work for you in every situation, including error pages. So instead of ignoring your 404 page, turn it into an opportunity. A well-designed custom 404 page can strengthen your branding, reduce bounce rates, and keep visitors exploring your site longer.