If you’ve just installed WordPress and you’re eager to make your site actually look like your site, you’re probably ready to install a theme. The plain default design is fine for testing things out, but it doesn’t exactly scream personality. The good news? Installing a WordPress theme is much easier than most beginners expect – and it only takes a few minutes once you know where to click.
Before we go any further, let’s clear up something important. This guide is specifically for WordPress.org, the self-hosted version of WordPress where you have full control over themes, plugins, and customization. It’s not for WordPress.com, which works a bit differently and comes with more limitations unless you’re on certain paid plans. If you’re not completely sure which one you’re using, I’d recommend reading my article “What is WordPress?” first so everything makes sense moving forward.
Now, when people hear “install a theme,” it can sound technical – like you’re about to mess with code or break something important. Relax. You don’t need to touch a single line of code. WordPress was built to make things user-friendly, and installing a theme is mostly just uploading a file or choosing one from the official directory.
It’s also worth understanding what a theme actually does before you install one. A theme controls the design and layout of your site – how your homepage looks, how blog posts are displayed, where menus appear, and so on. It doesn’t add special features like contact forms or SEO tools. If you’re still mixing those up, check out my “WordPress Themes vs Plugins” article to see the difference clearly. It’ll save you confusion later.
Choosing the right theme is exciting because this is where your website starts to feel real. Maybe you’re building a business site, a blog, an online store, or a portfolio. The theme sets the visual tone for everything. And the best part is, you can always switch themes later if you change your mind — WordPress makes that flexible.
In this guide, I’ll walk you through the simplest way to install a theme directly from your dashboard, and I’ll also show you how to upload a premium theme if you’ve purchased one from a third-party marketplace. Both methods are straightforward, and you don’t need any technical background to follow along.
By the time you’re done reading, you won’t just know how to install a theme — you’ll feel confident doing it on your own. So open up your WordPress.org dashboard, grab a cup of coffee, and let’s get your site looking the way you imagined.
Installing a WordPress Theme Directly from the Dashboard
The easiest way to install a WordPress theme is straight from your dashboard. This method is perfect if you’re using a free theme from the official WordPress theme directory. You don’t need to download anything manually or deal with files on your computer. Everything happens inside your WordPress.org admin area.
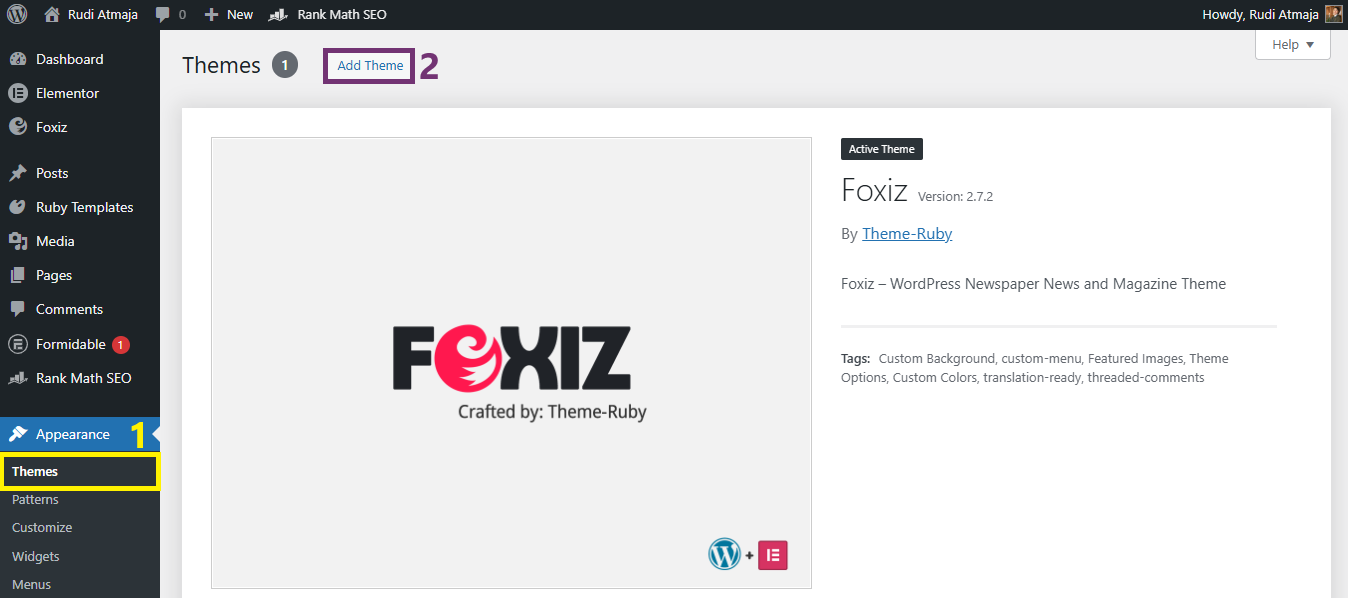
First, log in to your WordPress dashboard. On the left-hand menu, go to Appearance and then click Themes. You’ll see your currently installed themes, including the active one. At the top of the page, click the Add New button.
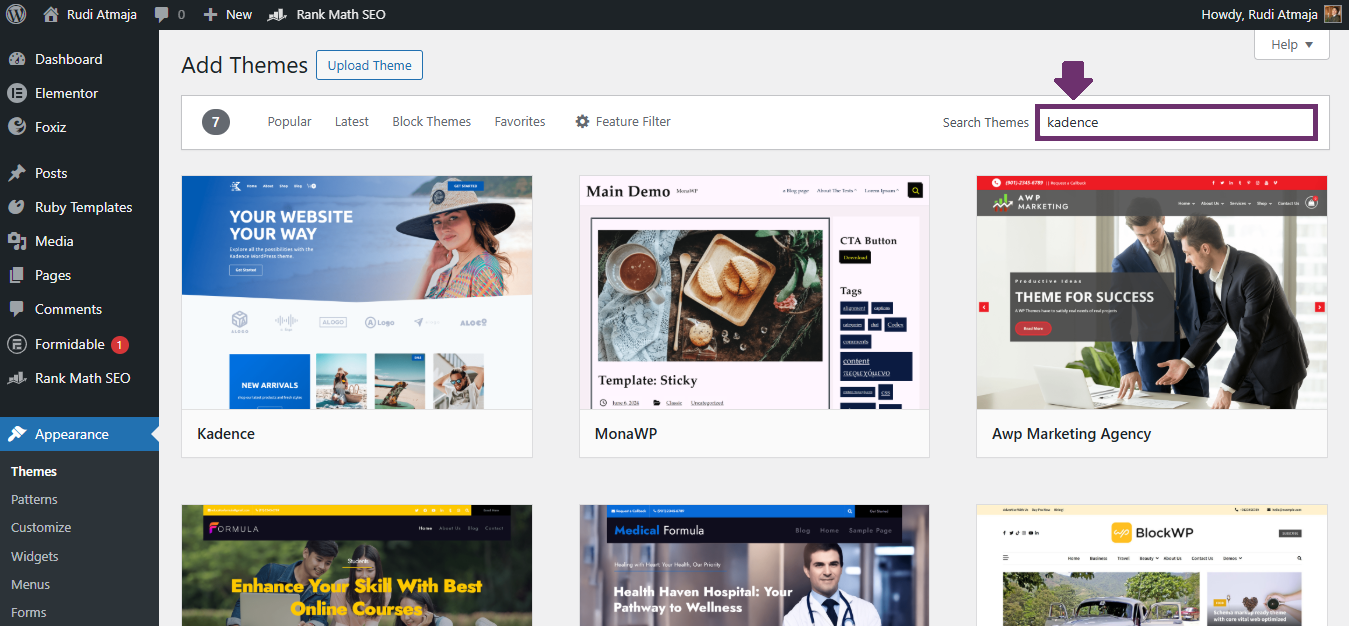
You’ll now be inside the WordPress theme library. Here, you can browse featured themes, popular ones, the latest additions, or use the search bar to find something specific. If you already have a theme name in mind, just type it in and press enter. You can also use the Feature Filter option to narrow things down based on layout, subject, or specific features.
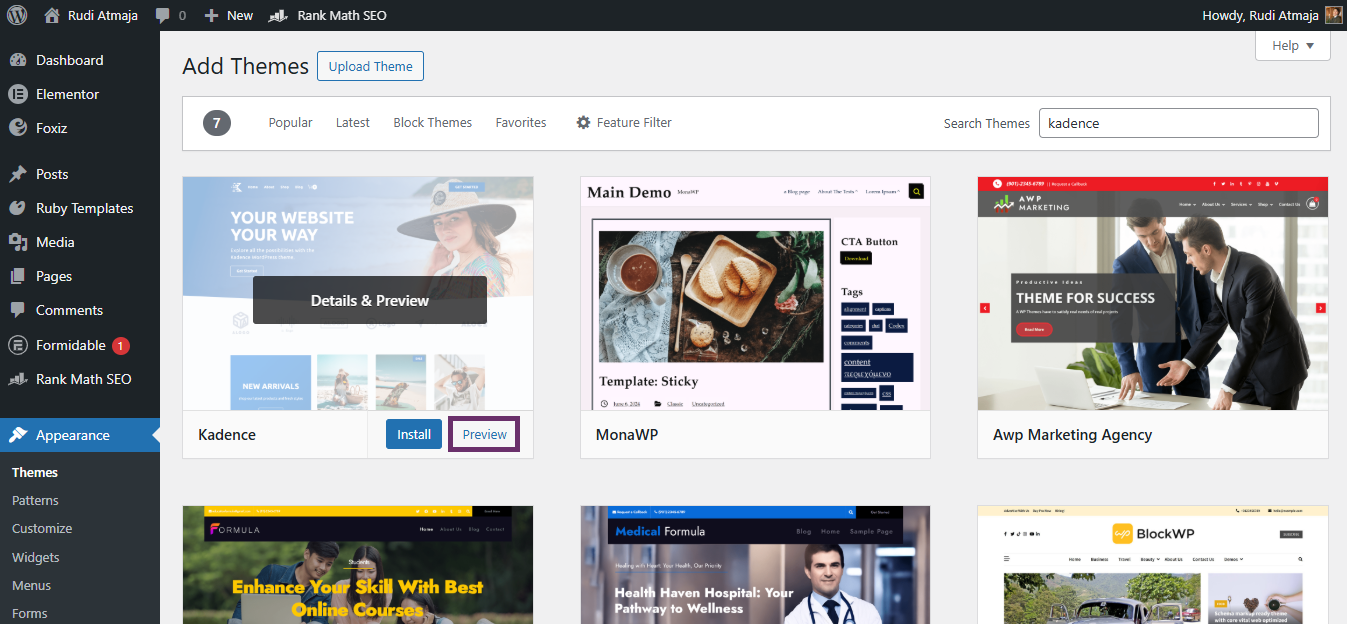
When you find a theme that catches your eye, hover over it and click Preview to see how it looks. Take a minute to explore the demo layout. While it won’t look exactly like the demo until you add your own content, it gives you a good sense of the design style and structure.
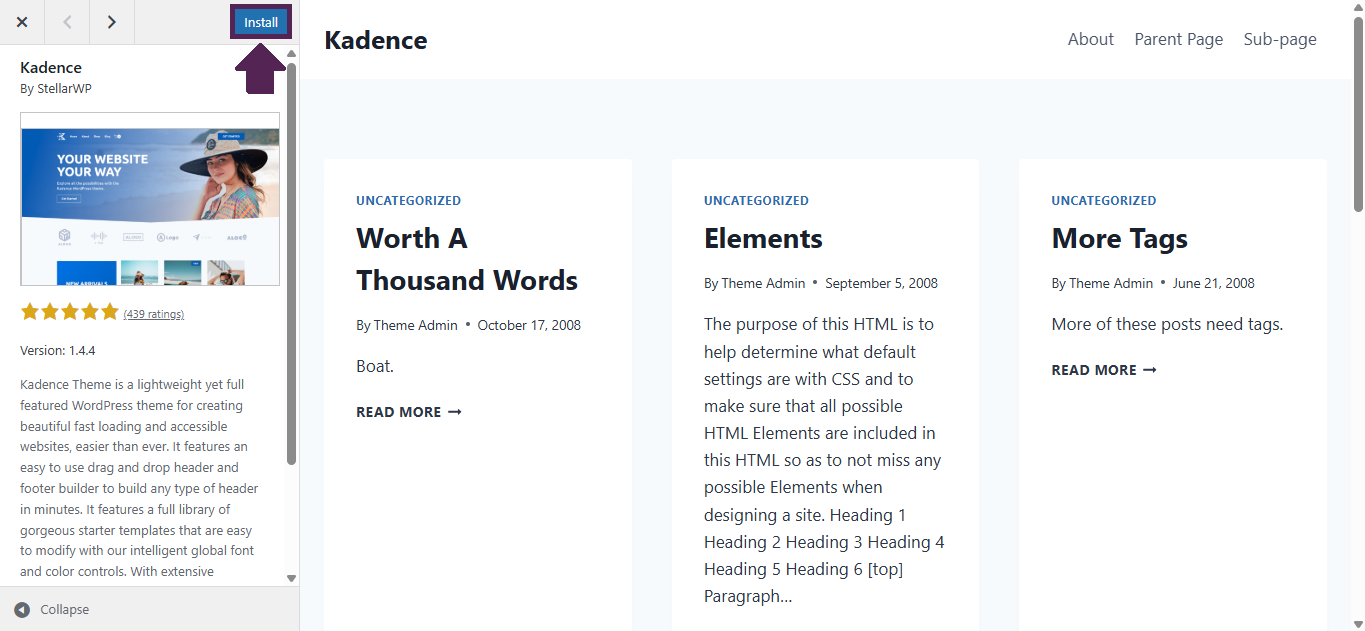
If you like what you see, click Install. WordPress will automatically download and install the theme for you. It usually takes just a few seconds. Once the installation is complete, the Install button will change to Activate.
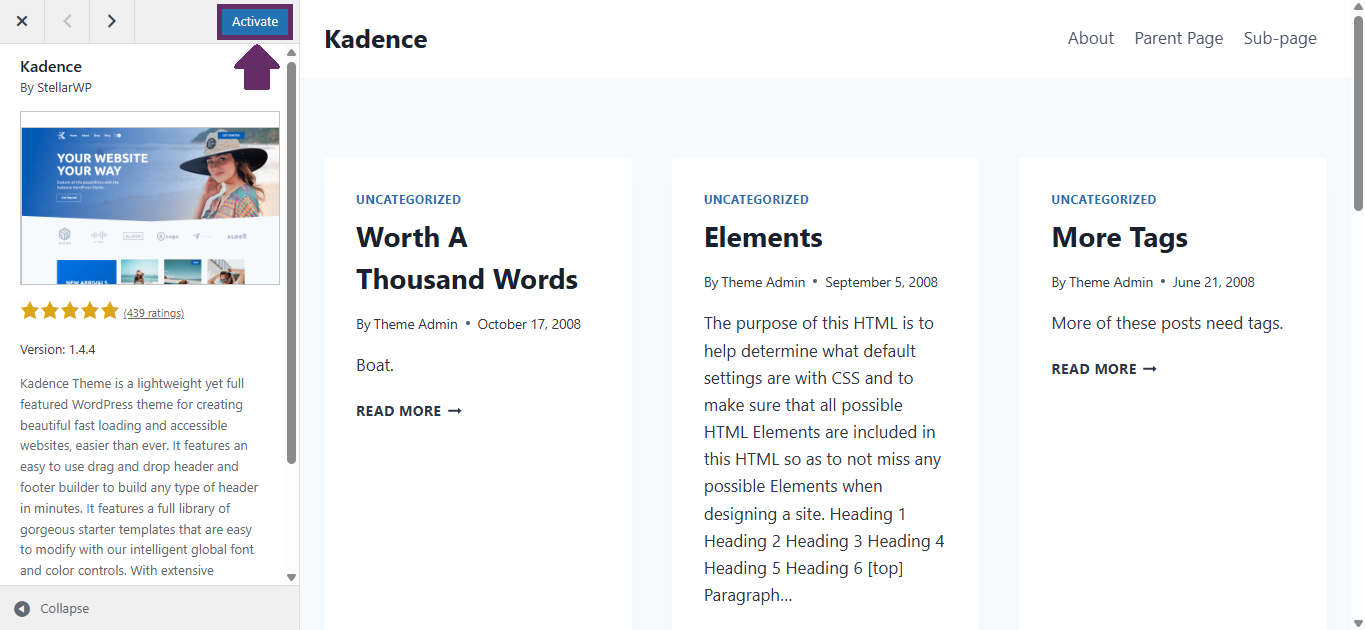
Click Activate, and that’s it — your new theme is now live on your website. You can visit your site in a new tab to see the changes instantly. From there, you can head to Appearance → Customize to adjust things like colors, logo, typography, and layout settings depending on what your theme allows.
That’s all there is to it. No coding, no complicated setup. Just a few clicks inside the dashboard, and your site has a completely new look.
Uploading a Premium WordPress Theme (ZIP File Method)
If you’ve purchased a premium theme from a marketplace or a theme developer’s website, the process is slightly different. Instead of choosing a theme from the WordPress directory, you’ll upload the theme file manually. Don’t worry – it still only takes a few minutes.
After purchasing, you’ll typically download a larger ZIP package from the marketplace. Here’s the important part: sometimes that file is not the actual theme file. It might contain documentation, demo content, licensing info, and inside it, another ZIP file that is the real theme you need to upload. So before heading to your dashboard, open the downloaded file and check what’s inside.
If you see folders like “documentation,” “license,” or “sample data,” look carefully for a separate file that ends in something like themename.zip. That inner ZIP file is usually the one WordPress needs. You should upload the actual theme ZIP file – not the full package you originally downloaded. This simple check can save you from the common “The theme is missing the style.css stylesheet” error.
Once you’ve confirmed you have the correct theme ZIP file, log in to your WordPress.org dashboard and go to Appearance → Themes then click Add New button.
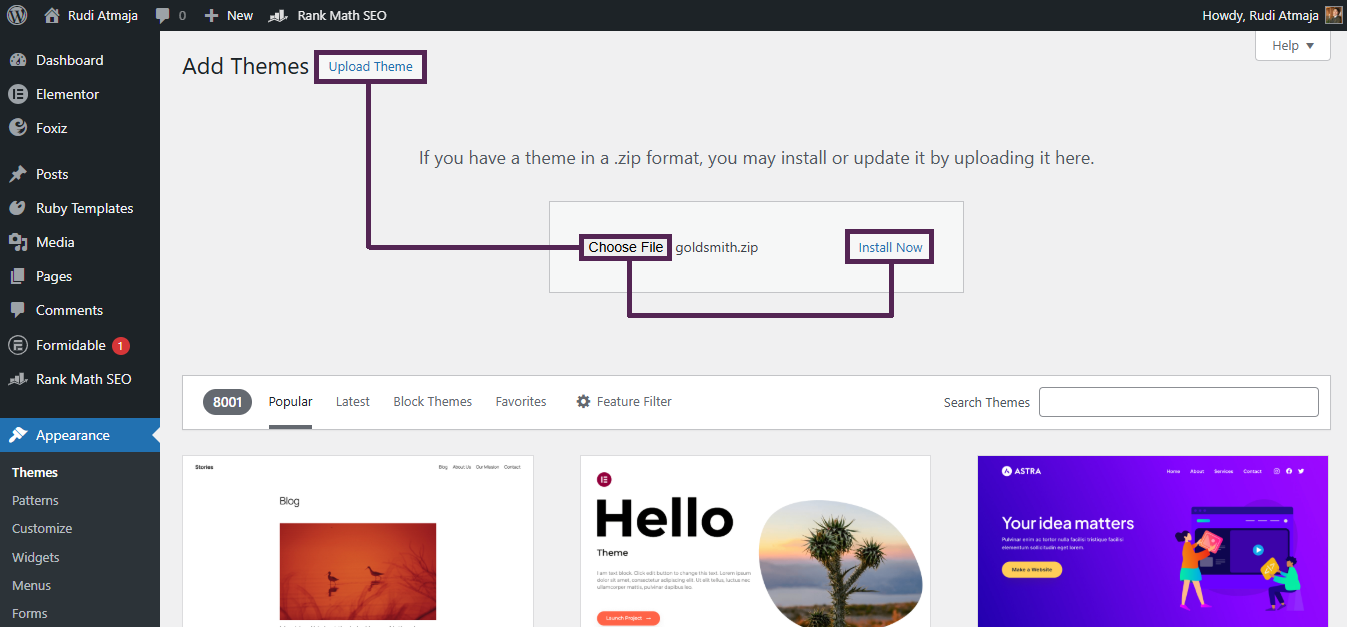
Then choose Upload Theme button at the top of the page. Now click Choose File, select the correct theme ZIP file from your computer, and hit Install Now.
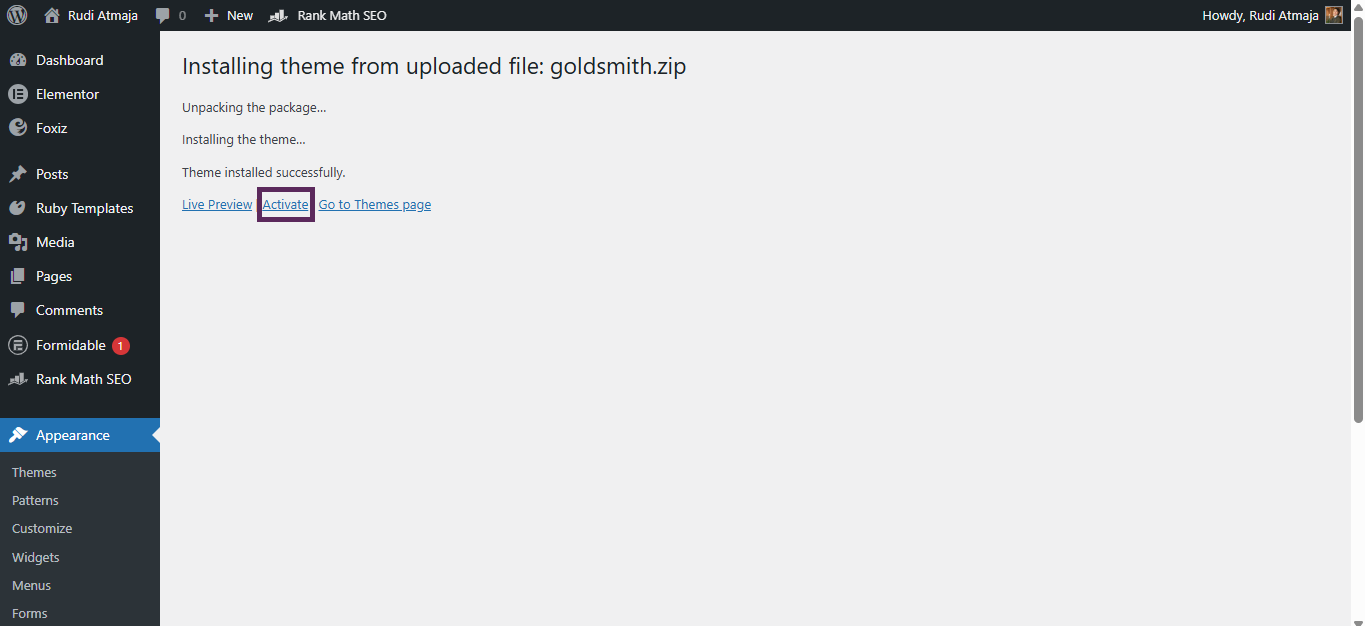
WordPress will upload and install the theme automatically. If everything goes smoothly, you’ll see a success message with an Activate button. Click Activate, and your new theme will immediately go live on your website.
After activation, many premium themes will prompt you to install required or recommended plugins. This is completely normal. These plugins usually power page builders, sliders, or additional design features that the theme depends on. Go ahead and install them if they’re marked as required.
From there, you can head to Appearance → Customize or check for a new theme options panel in your dashboard. Premium themes often include demo import tools, advanced layout settings, and more detailed customization options. Spend a few minutes exploring — this is where your site really starts to take shape.
Final Thoughts
At this point, you’ve seen both ways to install a WordPress theme on WordPress.org — directly from the dashboard or by uploading a ZIP file. Neither method is complicated, and once you’ve done it once, it becomes second nature. Most beginners are surprised at how quick the whole process actually is.
The most important thing is simply paying attention to the small details. Make sure you’re using the correct ZIP file if you’re uploading a premium theme. Double-check that you’re installing it on WordPress.org and not WordPress.com. And after activation, take a moment to review any required plugins or theme setup instructions so everything runs smoothly from the start.
Also, remember that installing a theme is just the beginning. Your site won’t instantly look like the demo preview – those demos usually include sample content, images, and custom settings. You’ll need to customize your layout, adjust typography, upload your logo, and possibly import demo content if the theme provides that option.
The good news is that WordPress gives you full control. If you don’t like how something looks, you can tweak it. If you decide the theme isn’t the right fit, you can switch to another one. Nothing is permanent, and that flexibility is one of the biggest advantages of using WordPress.org.
Now that your theme is installed, you’re ready to move on to the fun part – shaping your website into something that truly represents your brand, your content, or your business. Take your time exploring the customization options, test things out, and don’t be afraid to experiment. That’s how you learn, and that’s how your site starts to feel uniquely yours.